Step-by-Step: Applying for Highway Access Online (Where Available)
The digitization of government services has made accessing highway permits and permissions more convenient than ever before. The National Highways Authority of India (NHAI) and Ministry of Road Transport and Highways (MoRTH) have introduced online platforms to streamline the application process for highway access permissions. This comprehensive guide will walk you through the step-by-step process of applying for highway access online, making the entire procedure transparent and user-friendly.
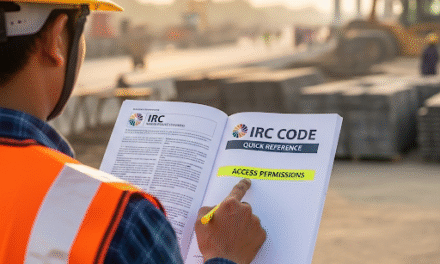
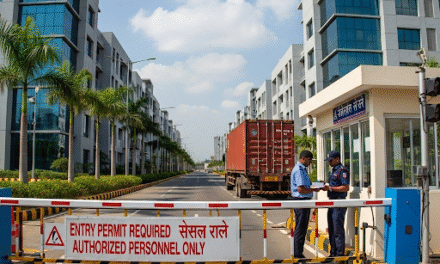
Understanding Highway Access Permissions
Before diving into the application process, it’s essential to understand what highway access permissions entail. These permits are required for:
- Construction of service roads or connecting roads to national highways
- Installation of utilities like water pipes, gas lines, or telecommunication cables
- Setting up toll plazas or weigh bridges
- Establishing fuel stations, restaurants, or other commercial establishments near highways
- Creating entry/exit points for industrial or residential developments
Prerequisites Before Starting Your Online Application
Required Documents
Ensure you have the following documents ready in digital format (PDF/JPEG):
- Land ownership documents – Sale deed, registered lease deed, or revenue records
- Survey settlement records – Village revenue records showing land classification
- NOC from local authorities – Clearance from municipal corporation/panchayat
- Environmental clearance (if applicable) – For projects requiring environmental assessment
- Traffic impact assessment – Professional study showing traffic implications
- Engineering drawings – Detailed technical drawings of proposed access
- Valid ID proof – Aadhaar card, PAN card, or passport
- Address proof – Utility bills or official correspondence
Technical Requirements
- Stable internet connection
- Computer or smartphone with updated web browser
- Valid email address for correspondence
- Mobile number for OTP verification
- Digital signature certificate (recommended for faster processing)
Step-by-Step Application Process
Step 1: Access the Official Portal
Navigate to the official NHAI portal at parivesh.nic.in or the dedicated highway access portal. The homepage displays various service options with clear navigation menus.
What you’ll see: A professional government website interface with options for different types of applications, user registration, and help sections. The main banner typically highlights recent updates and important notifications.
Step 2: User Registration and Login
Click on “New User Registration” if you’re a first-time user.
Registration Form Fields:
- Full name as per official documents
- Organization name (if applicable)
- Email address
- Mobile number
- Create secure password
- Select user type (Individual/Organization/Government)
What you’ll see: A clean registration form with mandatory fields marked with red asterisks. After submitting, you’ll receive an email verification link and SMS OTP for mobile verification.
Step 3: Dashboard Navigation
After successful login, you’ll land on your personalized dashboard.
Dashboard Features:
- Application status tracker
- Pending actions sidebar
- Quick links to frequently used services
- Recent applications history
- Important notifications panel
What you’ll see: A well-organized dashboard with clear sections for different functionalities. The left sidebar contains navigation options, while the main area shows your application summary and pending tasks.
Step 4: Initiating New Application
Click on “Apply for New Permission” and select “Highway Access Permission” from the dropdown menu.
Application Categories:
- Temporary access (construction/maintenance)
- Permanent access (commercial/residential)
- Utility crossing permissions
- Service road construction
- Toll plaza establishment
What you’ll see: A comprehensive form with multiple sections. The interface uses a step-by-step wizard format, showing your progress through numbered steps at the top.
Step 5: Project Details Section
Fill in comprehensive project information:
Basic Information:
- Project title and description
- Proposed location with GPS coordinates
- Highway name and chainage details
- District and state information
- Estimated project cost
- Expected completion timeline
What you’ll see: Interactive map integration where you can mark your exact location. Dropdown menus auto-populate with highway names and administrative divisions as you type.
Step 6: Technical Specifications
Provide detailed technical information about your proposed access:
Technical Details Required:
- Width of proposed access road
- Type of construction materials
- Drainage arrangements
- Safety measures planned
- Traffic management during construction
- Signage and road markings plan
What you’ll see: Technical forms with specific field validations. Some fields may have dropdown options with standard specifications, while others allow free text input for detailed descriptions.
Step 7: Document Upload Section
Upload all required documents in the specified formats:
Upload Guidelines:
- Maximum file size: 5MB per document
- Accepted formats: PDF, JPEG, PNG
- Clear, readable scanned copies
- Proper file naming convention
What you’ll see: A drag-and-drop interface for file uploads with progress bars. Each document type has specific slots with clear labeling. Preview options allow you to verify uploaded documents before submission.
Step 8: Fee Payment
Calculate and pay the required processing fees:
Fee Structure:
- Application processing fee
- Site inspection charges
- Technical evaluation fee
- Additional charges based on project scope
Payment Options:
- Net banking
- Debit/credit cards
- UPI payments
- RTGS/NEFT for large amounts
What you’ll see: Integrated payment gateway with multiple payment options. Fee calculator automatically computes total charges based on your application details. Secure payment interface with SSL encryption indicators.
Step 9: Review and Submit
Carefully review all entered information:
Review Checklist:
- Verify all personal and project details
- Confirm document uploads are complete
- Check payment transaction status
- Review terms and conditions
What you’ll see: A comprehensive summary page displaying all your entered information in an organized format. Edit buttons allow you to modify specific sections if needed. Final submission requires acceptance of terms and conditions.
Step 10: Application Confirmation
After successful submission, you’ll receive:
Immediate Confirmations:
- Unique application reference number
- Email confirmation with application summary
- SMS notification with tracking details
- Payment receipt download option
What you’ll see: A confirmation page with your application number prominently displayed. Options to download application summary and payment receipts. Clear instructions for tracking application status and next steps.
Post-Submission Process
Tracking Your Application
Use your reference number to track progress through various stages:
Application Stages:
- Document verification (5-7 working days)
- Technical evaluation (10-15 working days)
- Site inspection scheduling (3-5 working days)
- Site inspection completion (1 day)
- Final approval/rejection (7-10 working days)
What you’ll see: A visual progress tracker showing completed and pending stages. Estimated timelines for each stage with options to receive SMS/email updates.
Site Inspection Coordination
When your application reaches the inspection stage:
Inspection Process:
- Receive inspection schedule notification
- Coordinate with NHAI officials
- Ensure site accessibility
- Provide necessary clarifications
- Receive inspection report
Common Challenges and Solutions
Document-Related Issues
- Problem: Rejected due to unclear documents
- Solution: Ensure high-quality scans with proper lighting and resolution
Technical Specification Errors
- Problem: Incomplete engineering drawings
- Solution: Consult qualified engineers for detailed technical drawings
Payment Processing Delays
- Problem: Payment not reflecting in system
- Solution: Contact support with transaction reference number
Coordination Difficulties
- Problem: Unable to coordinate site inspection
- Solution: Maintain flexible schedule and clear communication
Tips for Faster Processing
Before Application
- Prepare all documents in advance
- Verify land ownership clarity
- Obtain necessary preliminary approvals
- Consult with technical experts
During Application
- Fill forms accurately and completely
- Upload high-quality documents
- Respond promptly to queries
- Maintain regular communication
After Submission
- Track application status regularly
- Be available for site inspection
- Respond quickly to additional requirements
- Maintain professional communication
Support and Assistance
Online Help Resources
- Comprehensive FAQ section
- Video tutorials for each step
- Sample document formats
- Technical helpline numbers
Offline Support Options
- Regional NHAI offices
- Dedicated help desks
- Technical consultation services
- Status inquiry counters
Conclusion
The online highway access application process has significantly simplified what was once a complex bureaucratic procedure. By following this step-by-step guide, applicants can navigate the system efficiently and increase their chances of successful approval.
Remember that preparation is key to success. Having all required documents ready, understanding the technical requirements, and maintaining clear communication throughout the process will ensure a smooth experience.
The digital transformation of government services continues to evolve, making citizen services more accessible and transparent. Stay updated with the latest procedures and requirements by regularly visiting official portals and subscribing to notifications.
Whether you’re planning a commercial development, residential project, or infrastructure installation, the online highway access application system provides a streamlined pathway to obtain necessary permissions while ensuring compliance with national highway regulations and safety standards.